You can read my thoughts about the bulky and heavenly Scheepjes Namaste yarn here.
I decided that the texture of this square called for a touchable and squishy pillow, so let's get on with it...
For materials, you'll need 4 balls of Scheepjes Namaste*. And remember, you can choose from any of 34 glorious colors.
I used a 6mm (J) hook for extra density. I don't like when my pillow form shows through. I also snagged a square (14"/35.5cm) pillow form from Amazon here*.
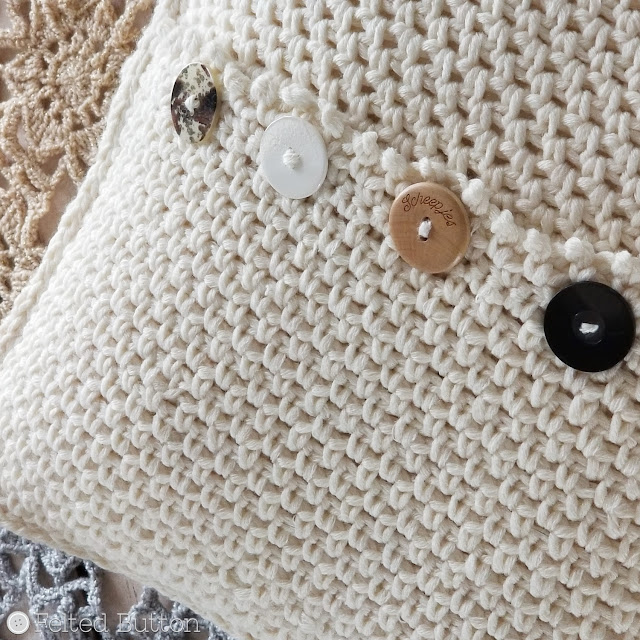
I also rummaged through my very large button stash and found 5 1 1/8" (2.85cm) buttons for the back closure. They don't match the pillow, or even each other, but hey, life is too short to be restricted in such uniform ways. If you want your pillow to be a good fit for your form, you can check your gauge after Rnd 6 where you should be at 4.5" (11.5cm) wide. If you are too big, adjust your hook down a size, if you are too small, go up a hook size.
A couple of notes about the pattern:
•
Pillow front is worked in the round with right side (RS) facing throughout,
joining at the end of each round. Pillow back is worked in rows, turning at the
end of each.
•
Ch 1 or ch 2 at the beginning of a round does NOT count as a stitch.
•
All joining at the end of a round is completed with a sl st.
The pattern is written in US terms. Here are the abbreviations you'll find in the pattern.
BLO
|
Back Loop Only
|
RS
|
Right Side
|
ch
|
chain
|
sc
|
single crochet
|
dc
|
double crochet
|
sk
|
skip
|
hdc
|
half double crochet
|
sl st
|
slip stitch
|
FPdc
|
Front Post double crochet
|
sp(s)
|
space(s)
|
FPCl(s)
|
Front Post Cluster(s) (see Special Stitches)
|
st(s)
|
stitch(es)
|
pop(s)
|
popcorn(s) (see Special Stitches)
|
tr
|
treble (triple) crochet
|
rep
|
repeat
|
WS
|
Wrong Side
|
Rnd(s)
|
Round(s)
|
yo
|
yarn over
|
Most of the stitches are pretty basic, but there are a couple that might be new to you so let me explain them:
•
FPCl (Front Post Cluster): [yo twice,
insert hook from front to back to front around post of indicated st, yo and
draw up loop, (yo and draw through two loops) twice] twice, yo and draw through
all 3 loops on hook
•
pop (popcorn): work 3 tr in
designated st, remove working loop from hook, insert hook in top of first tr,
replace working loop on hook and draw through st
•
picot: ch 3, sl st in first ch
Remember, with the FPCl, you'll do everything in the [brackets] first just one time, then do it all again before you yarn over and draw through all 3 loops on your hook.
Since the beginnings of this pattern began with my Asanas Blanket. you can get the first 12 rounds of the pattern here, just don't fasten off and let's keep on hooking! Below are Rnds 13-22.
Rnd 13: ch 1, hdc in st below
and next 7 sts, FPdc around next st, *dc in ch-1 sp, ch 1, FPCl around FPCl, ch
1, dc in ch-1 sp, FPdc around next st**, hdc in next 21 sts, FPdc around next
st; rep from * 2 more times, then from * to ** once, hdc in next 13 sts, join
to first hdc (21 hdc, 2 dc, 2 FPdc, 2
ch-1 sps –between FPCls)
Rnd 14: ch 1, hdc in st below
and next 9 sts, *dc in ch-1 sp, ch 1, FPCl around FPCl, ch 1, dc in ch-1 sp**,
hdc in next 25 sts; rep from * 2 more times, then from * to ** once, hdc in
next 15 sts, join to first hdc (25 hdc, 2
dc, 2 ch-1 sps –between FPCls)
Rnd 15: ch 1, hdc in st below
and next 10 sts, *dc in ch-1 sp, ch 1, FPCl around FPCl, ch 1, dc in ch-1 sp**,
hdc in next 27 sts; rep from * 2 more times, then from * to ** once, hdc in
next 16 sts, join to first hdc (27 hdc, 2
dc, 2 ch-1 sps –between FPCls)
Rnd 16: ch 1, hdc in BLO of st
below and next 11 sts, *hdc in ch-1 sp, ch 3, (pop, ch 1, picot, ch 1, pop) in
FPCl, ch 3, hdc in ch-1 sp, hdc in BLO of next 29 sts; rep from * 2 more times,
then from * to ** once, hdc in BLO of next 18 sts, join to first hdc (31 hdc, 2 ch-3 sps –between pops at corners)
Rnd 17: ch 1, hdc in BLO of each
st around working ch 3 behind each corner pop group, join to first hdc (31 hdc –between ch-3 corner sps)
Rnd 18: ch 1, sc in st below,
*(ch 1, sk 1 st, sc in next) to corner, ch 1, dc in ch-3 sp, ch 1, (sc, ch 1, sc)
in picot of Rnd 16, ch 1, dc in ch-3 sp, ch 1, sc in next st; rep from * 3 more
times, ch 1, sk 1 st, (sc in next, ch 1, sk 1 st) rep to first sc, join to
first sc (17 sc, 2 dc, 19 ch-1 sps –between
corner ch-sps)
Rnd 19: ch 1, sc in next ch-1
sp, (ch 1, sk 1 st, sc in next ch-1 sp) rep around placing (sc, ch 1, sc) in
each corner ch-sp, join to first sc (21
sc and 20 ch-1 sps –between corner ch-sps)
Rnds 20-22: rep Rnd 19, fasten off
(24 sc and 23 ch-1 sps – between corner
ch-sps at end of Rnd 22)
Weave
in ends and block as desired.
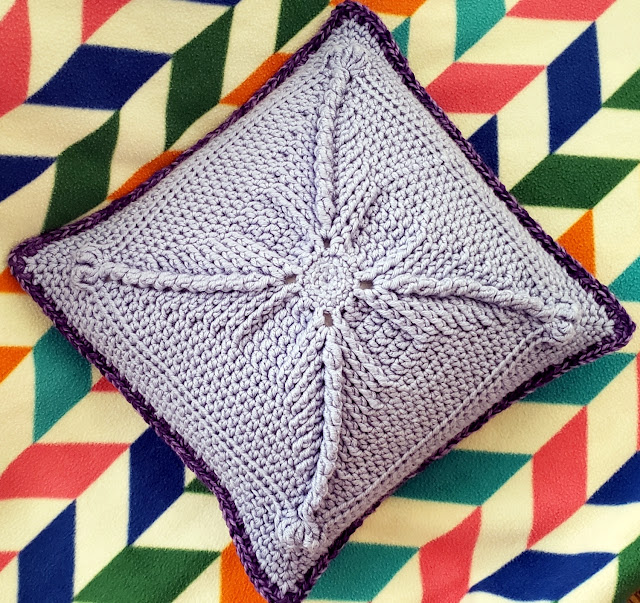
Here's a photo of the front made by my tester, Lindsey.
 |
| Photo by Lindsey King. Used by permission. |
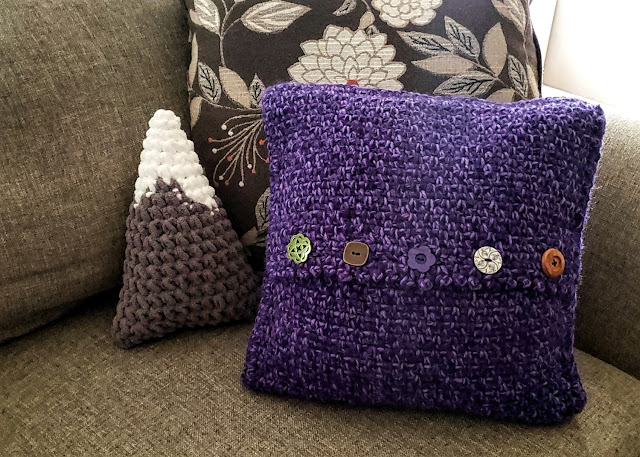
It's made with a top "buttonhole" placket and a bottom placket so you can remove your pillow to wash the cover.
I particularly like the texture and it is worked in my favorite stitch pattern--linen/moss stitch. It is so tidy and versatile and looks pretty on both sides. Because of this, don't give too much attention to the RS and WS as you are working. The only time you need to worry about which side is the right side is the picot edge on the last row of the top placket.
Here's how to work the cushion cover back:
Top
Placket
Ch
48 (multiples of 2)
Row 1: sc in second ch from
hook, (ch 1, sk 1 st, sc in next ch) rep across, turn (47 sts)
Row 2: ch 1, sc in first ch-1
sp, (ch 1, sk 1 st, sc in next ch-1 sp) rep across, ch 1, sc in last sc, turn
Row 3: repeat Row 2 until
piece measures 6.5” (16.5cm), continue with buttonhole rows
Buttonhole Rows of Top
Placket:
Row 1: ch 1, sc in first ch-1
sp, sc in next 4 sts, ch 3, sk 3 sts, (sc in next 5 sts, ch 3, sk 3 sts) 4
times, sc in last 6 sts, turn
Row 2: ch 1, sc in first st,
*(ch 1, sk 1 sc, sc in next st,) twice, ch 1, (sc, ch 1, sc) in ch-3 sp; rep
from * 3 more times, ch 1, sk 1 st, sc in next st, ch 1, sc in last st, turn
Final Row (WS): ch 1, (sc in next ch-1
sp, picot) across, sc in last 2 sc, fasten off
Bottom
Placket
Rep
Rows 1-2 as for Top Placket until piece measures 8” (20cm). Note: There is no RS/WS with this piece.
 |
| Photo by Lindsey King. Used by permission. |
Just an additional note, if you are interested in making the cover larger, you could continue working the repeat rounds for the cover front to the desired size and then make the back the proper width by increasing the foundation chain in multiples of 2. You'll only need to make one of the plackets a bit taller until the top and bottom plackets overlap.
To get things finished up, hold the wrong side of the pillow
front and pillow back together with the buttonhole placket of back panel on top. Then sl
st through both layers of the front and back evenly around being careful to work through all
thicknesses where the top and bottom plackets of the pillow back overlap. Fasten off and weave in ends. Attach any fun buttons of your choice in alignment with the buttonholes and insert pillow form.
So there you go!! I hope you like it. I'm really pleased with mine. If you would like to have a nice and tidy PDF without ads and such, you can purchase the pattern for a small fee in my Etsy shop here.
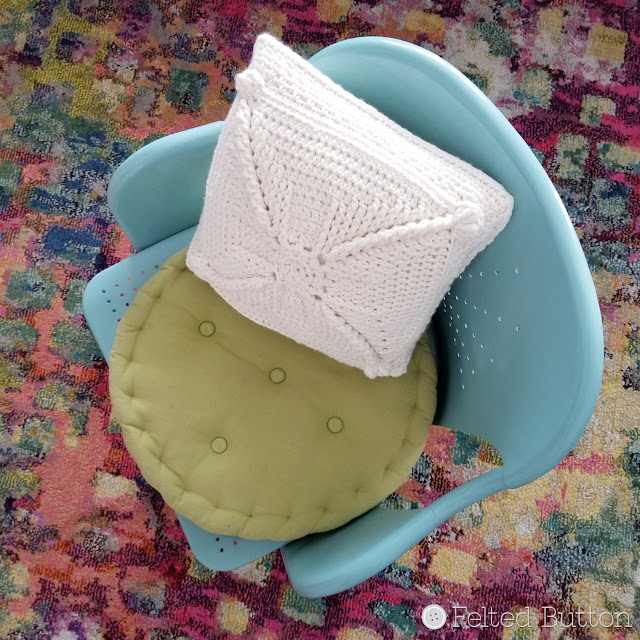
I just finished painting my bedroom a soothing icy blue and I think my pillow will be perfect in there on one of my sitting chairs in the bay window. Maybe I need to make a second one for the matching chair...hmmmm.
If you want to snag some Scheepjes Namaste for your Asanas Pillow, you can find it at any of the places below, all with worldwide shipping:
Wool Warehouse *(UK)
Deramores *(UK)
Black Sheep Wools *(UK)
Knotty House *(CA)
Local Scheepjes Stockists
Deramores *(UK)
Black Sheep Wools *(UK)
Knotty House *(CA)
Local Scheepjes Stockists
I'm just finishing up a border on a new blanket design and have a bazillion other projects hanging in the wings. I'll drop in and post soon. In the meantime--be well, my friend! xx
| On the Board | -- Every day may not be good, but there is something good in every day.
*This post contains affiliate links. If used by you they cost you no more, but provide me a small comission that allows me to continue providing free patterns. Thanks!


No comments:
Post a Comment
I love to hear your thoughts, and I read each and every comment! Take a minute to say hello! Because remember, "Sharing is nice!"