 |
| Photo used courtesy of Scheepjes. |
Let me tell you how they came to be and hopefully I can infuse a little courage so you'll want to try making your own pair, too. As soon as I got home I threw the cardigan in the washing machine on a super hot wash-cycle with a couple of other non-shedding items, a teeny bit of soap, and held my breath. When the cycle was done, I was gleeful as the sweater felted beautifully--albeit a LOT! It went from a medium adult to small enough for a 2 year old with the entire sleeves being just long enough for my vision for an adult mitt. (Phew--it's the unknowns you sometimes get with this felting gig.) Notice how I felted it until the stitches disappeared leaving me with a dense and durable fabric.
After gathering some supplies like Scheepjes Sweet Treat* for some impromptu embroidering on the mitts, some silk ribbon scraps, scissors, measuring tape, 3mm crochet hook, chalk, needle, and buttons stolen from another wool cardi, I was ready.
 |
| I ended up using Sweet Treat colors #402 Silver Green and #240 Amethyst. |
First thing I needed to do was cut the sleeves from the sweater.
Since I so effectively shrank the sweater, what I had was a sleeve length about 12" (30.5cm) long. To start, I wanted every bit of that length--because I could always trim some later, if needed.
I also knew I was going to fold both ends of the mitts for some interest so that gave me some flexibility in length because I could adjust the width of the folded cuff. Next I needed to cut some thumb holes. I first marked mine with some chalk--about 4.5" (11.5cm) from the finger-end of the cuff--then cut it with sharp scissors approximately 1.4" (3.5cm) long, or whatever length is comfortable for your thumb. Also, I placed the thumbhole cuts close to the seam rather than directly on it.
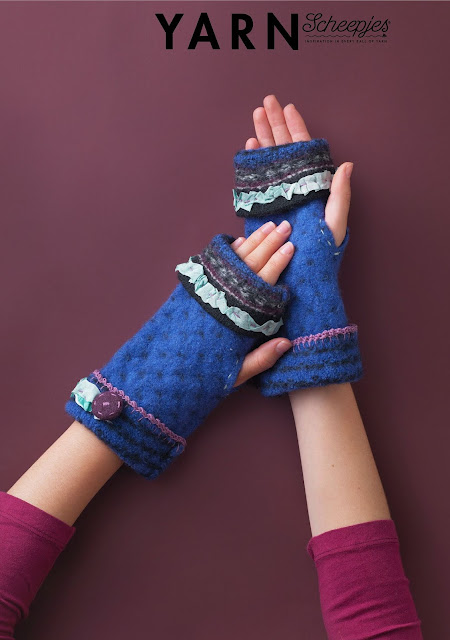
I folded the finger end down 2.2" (5.5cm). Then I intentionally created a messy, contrasting running stitch with my Sweet Treat through some lovely, crumpled silk ribbon around the edge of the cuff for an Anthropologie-esque feel. (Plus, for those of you who are not masters at embroidery, it makes it much less intimidating, right?)
I was definitely not going for perfect here. Remember, this is supposed to be a creative process with some whimsy and interest!
Then using another contrasting color of Sweet Treat--this one matching the ribbon, I did another simple running stitch around the thumb hole. Keep in mind, this is only decorative because the felted fabric is so durable, it will not split or fray when cut--did I say magic?
Then I decided to fold the wrist end down about 1.5 " (4cm) to show off the neat lines created from the fair-isle stitching of the sweater. I like the contrast that it presents against the wee "v's" on the right side of the fabric. The buttons which I cannibalized from another felted sweater in deep purple were perfect--not only because of their color, but because they could also be embroidered. Now let me share with you how I completed the crocheted detail at the wrist end of the mitts.
I started with a blanket stitch. Insert your needle as shown above--under the cut edge to about .5" (1.25cm) from the edge.
Then pull your thread through, but before pulling tightly, insert your needle through the loop you've just made from right to left. This will pull your stitch over so it is perpendicular to the fabric's edge. I always try to make my stitches as "square" as possible by making the distance from the cut edge to the top of the stitch the same as the distance between each stitch. This makes for little "boxes". But, remember, we're going for creative process here, so don't stress too much if they are not perfect.
After my blanket stitch is complete, I use it as a foundation for crocheting my little scalloped edging. (Don't worry about right or wrong side here--it looks awesome on both sides.) Here's how I did it (US crochet terms):
sc = single crochet
hdc = half double crochet
sl st = slip stitch
With a slip knot on your hook, insert your hook under one of the horizontal loops of your blanket stitch, as shown above, yarn over and draw up a loop, then yarn over and draw through both loops on your hook. Sc join complete.
Now, (hdc, sl st) in the same loop as joining, (sc, hdc, sl st) in each horizontal loop around, join to first sc, fasten off and weave in your ends.
Easy peasy, huh?
Like I mentioned I also added some simple embroidery to the buttons since they were fabric covered and attached them to the wrists--with some bonus ribbon tacked down around the outer part of each wrist's edge. Now it's time to make your second one--be mindful of the positioning of your thumb slit and you're off!
I also embroidered a few little V's on the body of the cuff for additional detail.
Ta-Dah!!
 |
| Photo used courtesy of Scheepjes. |
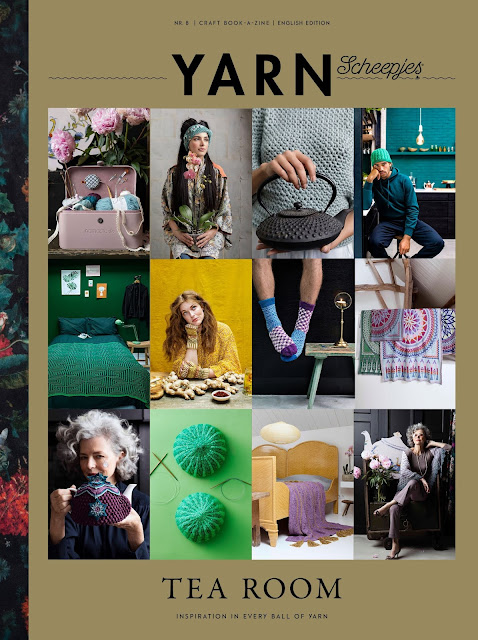
I would love to see yours if you give this a go! Please share your makes to social media by using #SimysChallenge. You can also share any crochet happenings in your world of the upcycled, colorful, felted and yarny variety in my Felted Button Crochet Community Facebook group here. And if you want to check out the other really phenomenal--and I mean, phenomenal, beyond-any-other type-of-crochet-designs-you-can-find-anywhere, fit-for-a-runway phenomenal--check out the newest issue of YARN Book-a-Zine available from Wool Warehouse here*.
 |
| Photo used courtesy of Scheepjes |
It's all sheer elegance and beauty! As are you...
| On the Board | -- When it rains, look for rainbows. When it's dark look for stars.
*This post contains affiliate links.


No comments:
Post a Comment
I love to hear your thoughts, and I read each and every comment! Take a minute to say hello! Because remember, "Sharing is nice!"